

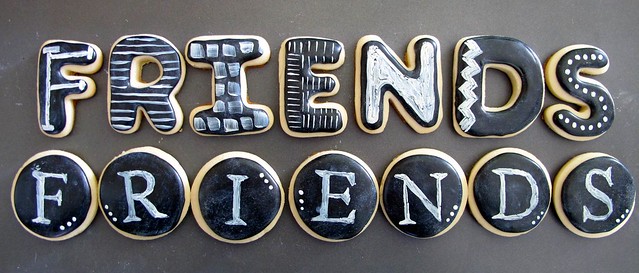
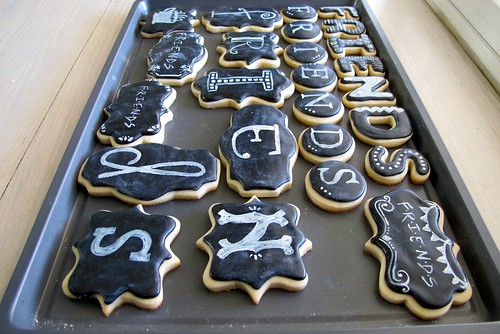
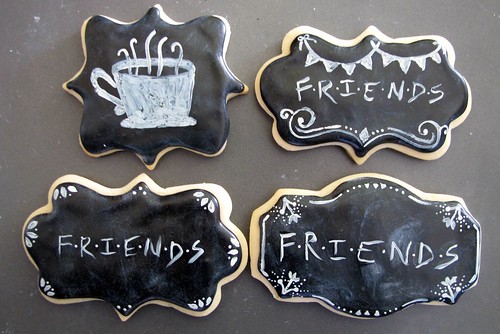
I’ve been seeing chalkboard cookies all over Pinterest for a while now. Chalkboards are all the rage currently…even the edible kind. I had read several ways to make them…lots of suggestions on what method works best, but hadn’t had a chance to give any of them a try just yet. A friend asked me to make some cookies for a super fun Friends party she’s having and I quickly said yes and new exactly what I wanted to try.
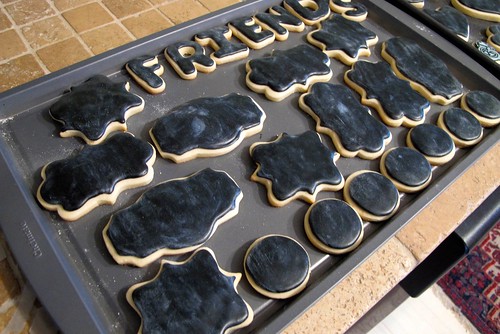
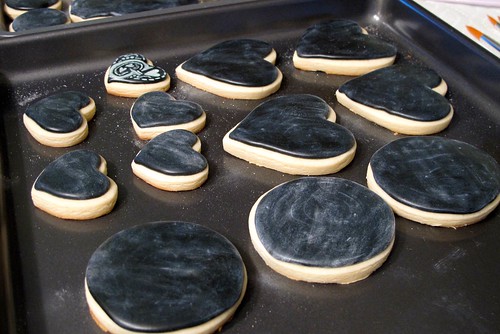
I always use Sugarbelle’s Basic Sugar Cookie recipe and love the Decorated Cookie’s Royal Icing (sort of) recipe. I’ve eaten a lot of cookies in my 31 years and tried a million different recipes, but this combo remains my absolute favorite. I made my cookies and then let them sit for a day and then lined and flooded the cookies in black and let them dry for another day. Last night I was really wanting to finally give the chalkboard technique a try, so I used one small heart cookie to test.
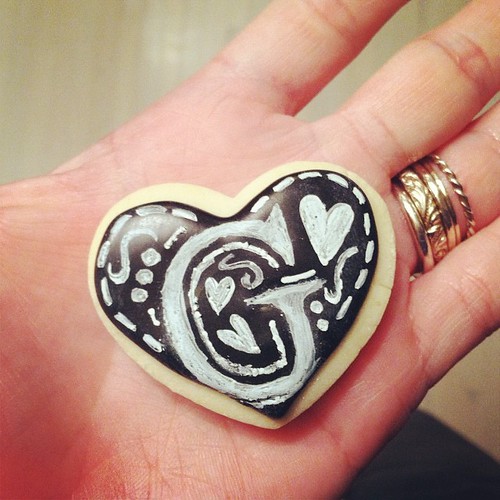
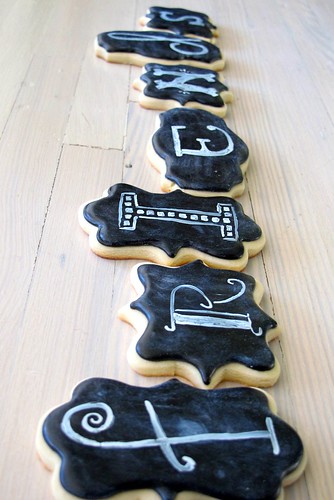
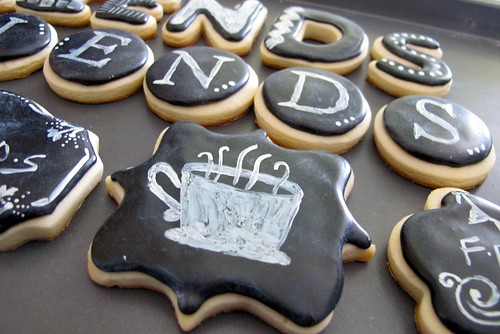
After trying several things, here is what I liked best. I didn’t like how super stark the above cookie looked…I wanted all the cookies to look like well loved little chalkboards, so the first thing I did when I started today was dust all the cookies with some white luster dust. You can find it in the baking section of most craft stores. I bought mine at Joanns.
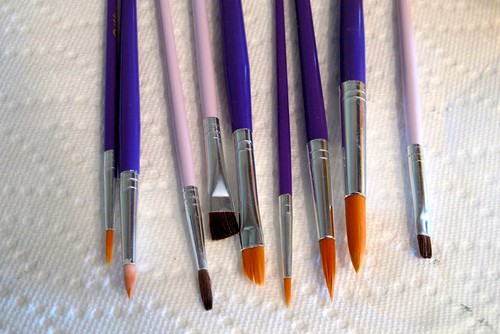
I used to paint a lot and used tons of different sized brushes, I assumed I would want to do the same when painting cookies, so I bought several different sized Wilton brushes. Again, you can find them in the baking section of most craft stores.
There are several ways to do the white chalk look, but after trial and error and several different techniques, here’s what I liked the best: 1 part vodka, 3 parts white food coloring. I used Americolor. And the other little tube is the luster dust.
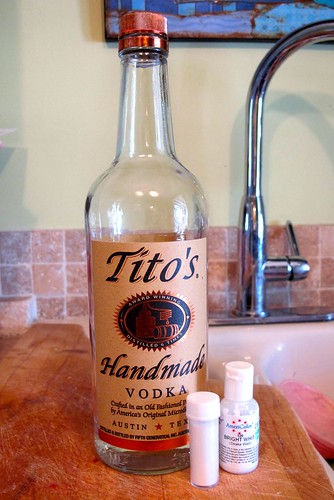
And yes, there’s not much in the vodka bottle. A) I spilt some all over the counter and B) Over the holidays friends and I enjoyed some yummy drinks that contained vodka and Cranberry Sierra mist. So good and festive.
I used a 1/8 teaspoon to measure out my chalk paint. 1/8tsp vodka + (3) 1/8tsp white food coloring. I mixed it together really well in a little bowl. And then I got started.
One of my goals for 2014 was to become better at hand lettering. I can do it some, but I really want to get better and better at free handing lettering…I know it’s a strange goal, but as an artist it’s important to me. So I have been taking a class online that works on my hand lettering style. {Insert geek award.} But I love it and it’s really stretching me as an artist. So I freehanded my cookies. BUUUUUUUUTT, before you say you can’t do something like this, you totally can. Tutorial after tutorial after tutorial I read and looked at showed lots of people using stencils or copying an image off their computer screen and then tracing it on to parchment paper and making their own stencil or using a Kopykake machine or using new, clean rubber stamps. So there are lots of options out there for this style of cookie for those of you who do not feel comfortable going freehanded. Just look around and read and see what style would work best for you.
I thought through how I wanted each cookie to look and then I got busy.
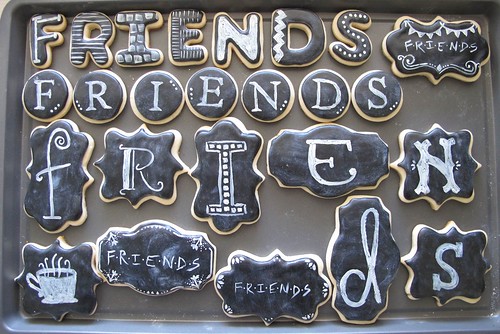

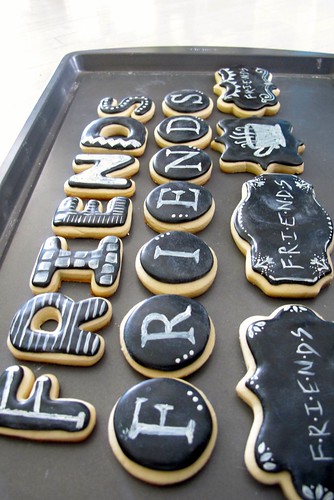
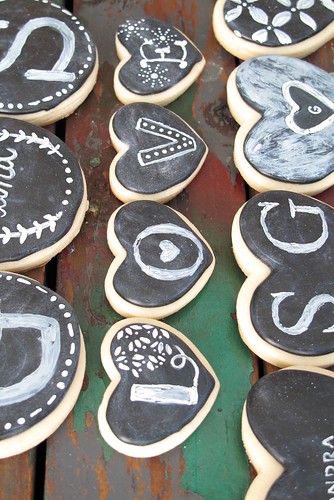
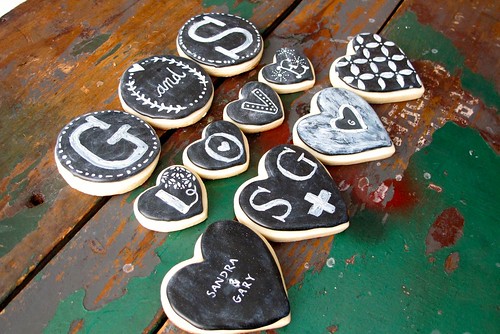
I also made an extra set of cookies for a sweet friend who loves these cookies…a little love set.
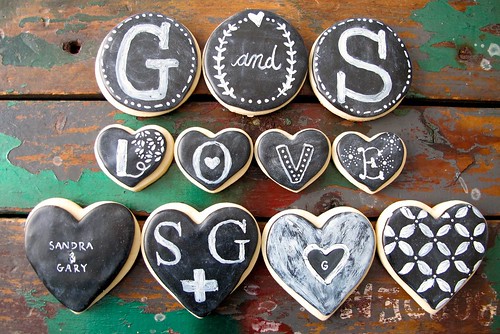
And there you have…chalkboard cookies. I’m trying to think through other questions you may ask.
I got the fun shaped frame cookie cutters HERE. Search frame.
I also like these bottles for lining and flooding the cookies. Small ones HERE and large ones HERE.
Think that’s it. Hope everyone has a great weekend. Happy Friday!